
With the .NET Framework, creating and delivering WebJobs to a WebApp in Azure has never been so easy, using the WebJobs SDK of Azure. Unfortunately, as I am writing this article, the WebJobs SDK is not available for .NET Core.
We will see in this article how to integrate some .NET Core WebJobs into a .NET Core WebApp and how to deploy them using VSTS.
Requirements
We will use .NET CORE 2.0 and the dotnet CLI in this example. If you don’t have it yet, install it from the Microsoft Website. As this article uses the basic commands of the dotnet CLI, take a look at the documentation if you are not familiar with those tools. This example is also valid with a .NET CORE 1+ application.
WebApp and WebJobs creation
The dotnet CLI allows us to use different predefined templates in order to create Web applications, libraries, console applications, etc… Use the following command in order to see all the available templates :
dotnet new --helpFor this example, let’s start by creating a new empty web application :
dotnet new web -n Azure.WebAppLet’s now create two console applications, each one representing a WebJob we will deliver with our WebApp.
dotnet new console -n Azure.WebJob.Continuous
dotnet new console -n Azure.WebJob.Triggered
And let’s create a solution file in which we will reference all our projects, in order to build them all at once.
dotnet new sln -n Azure.Solution
dotnet sln add .\Azure.WebApp\Azure.WebApp.csproj
dotnet sln add .\Azure.WebJob.Continous\Azure.WebJob.Continous.csproj
dotnet sln add .\Azure.WebJob.Triggered\Azure.WebJob.Triggered.csproj
Let’s now build this newly created solution :
dotnet buildIt is now time to publish our web application. In order to do so, let’s drill down into the web application’s folder and execute the following command :
dotnet publishWe now have a web application which is built and ready to be delivered to Azure. If you look into the "/bin/[build-configuration]/[netcore-version]/publish" folder, you’ll see all the necessary files in order to deliver your web application. Let’s now focus on the WebJobs.
Preparing the WebJobs to be executed on Azure
It is necessary to understand how Azure handles the WebJobs. A WebJob is a component of a WebApp, and can be either continuous or triggered.
Azure allows multiple file types to be run as a WebJob, but not (yet?) a library. If we try to deliver our console application directly, Azure won’t be able to execute it. Luckilly for us, we can still use the dotnet CLI in order to execute our WebJob on Azure. Let’s then add a run.cmd file on our two WebJobs folders with the following content :
@echo off
dotnet Azure.WebJob.Continous.dll
@echo off
dotnet Azure.WebJob.Trigerred.dllThose files need to be part of our WebJob’s projects and to be copied to the output folder when compiling, so they can be delivered with our WebJobs. To do so, add the following lines in each of your WebJob’s .csproj :
<ItemGroup>
    <Content Include="run.cmd">
  <CopyToOutputDirectory>Always</CopyToOutputDirectory>
    </Content>
</ItemGroup>
We can also setup the scheduling of our triggered WebJob. To do so, create a settings.job file on your WebJob’s folder, insert your CRON expression and include the file to the .csproj the same way we did for the run.cmd file. Remember that the "Always On" property need to be activated on your WebApp in order to be able to schedule your WebJobs. For more information concerning the CRON expression, take a look at this article.
Concerning the folder structure, when hosted on Azure, the WebJobs are stored into the "App_Data/Jobs/[Job_Type]/[Job_Name]" folder of the web application. That’s exactly the same folder structure we want to create when publishing our web application.
Publishing the WebJob within our WebApp
So we need to include our WebJobs into the App_Data folder of our application, when this one is being published. We can use the Target element of the .csproj to do so. Let’s add those lines at the end of the .csproj of our WebApp :
<Target Name="PostpublishScript" AfterTargets="Publish">
    <Exec Command="dotnet publish ..\Azure.WebJob.Continous\ -o $(ProjectDir)$(PublishDir)App_Data\Jobs\Continuous\Azure.WebJob.Continous" />
    <Exec Command="dotnet publish ..\Azure.WebJob.Triggered\ -o $(ProjectDir)$(PublishDir)App_Data\Jobs\Triggered\Azure.WebJob.Triggered" />
  </Target>
After publishing our WebApp, the publish process will also publish our two WebJobs and integrate them into the WebApp, in the APP_DATA folder. Our WebApp can be deployed to Azure, the two WebJobs will be recognized and triggered.
Deploy using VSTS
The deployment with VSTS is quite simple. For simplicity, I will do the build and the delivery to Azure within the build process. I usually prefer to do it inside a release process in order to be able to manage the different slots I can have for a WebApp.
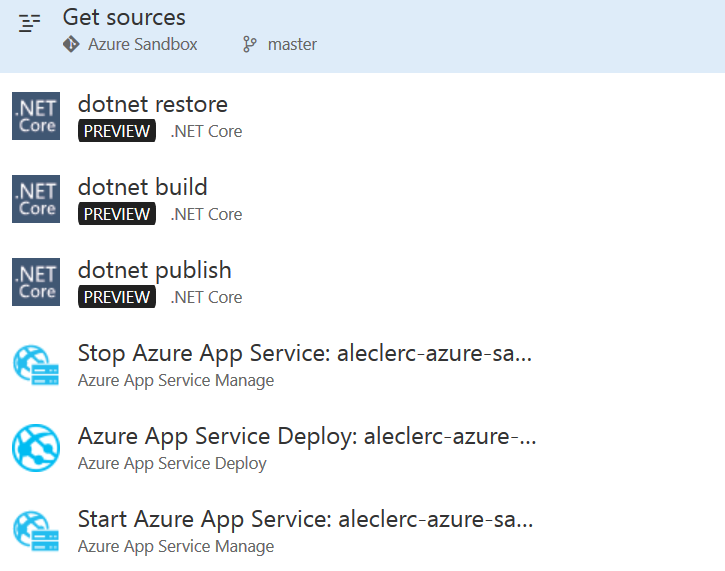
The dotnet restore, build, and publish tasks are the one we already executed locally. On the publish task, I am creating a .zip file with the published WebApp.

On the deploy to Azure task, I am targeting this .zip file in order to use it as my deploy file. This example is using the KUDU Rest APIs to deploy the application.
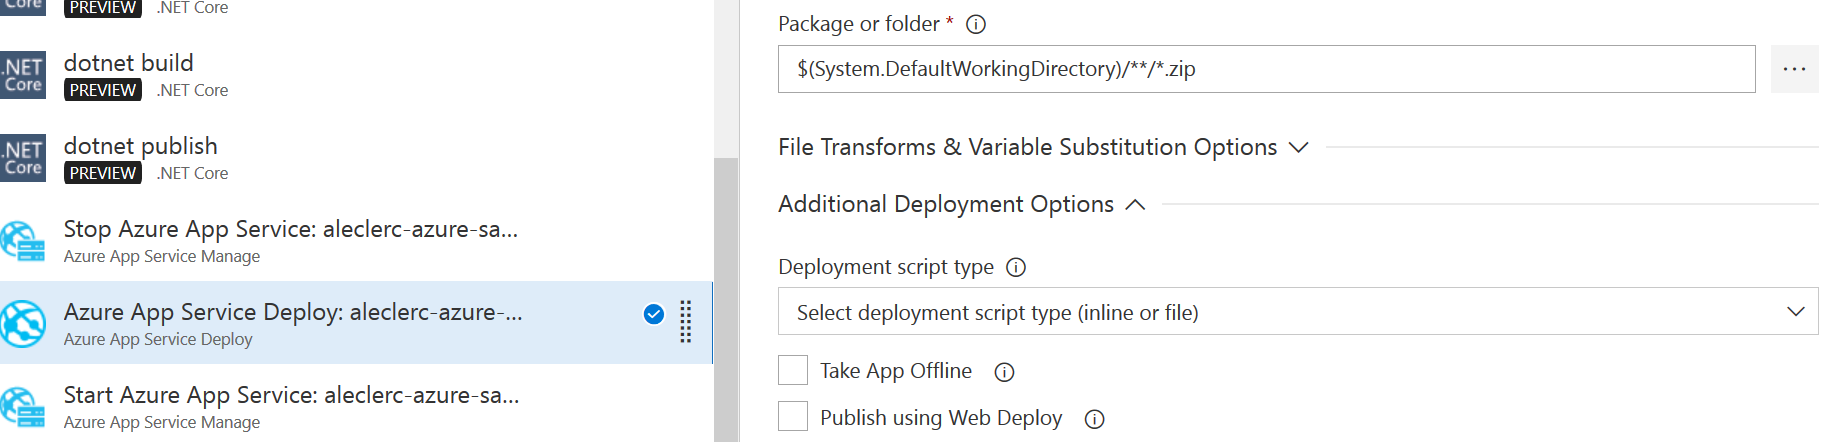
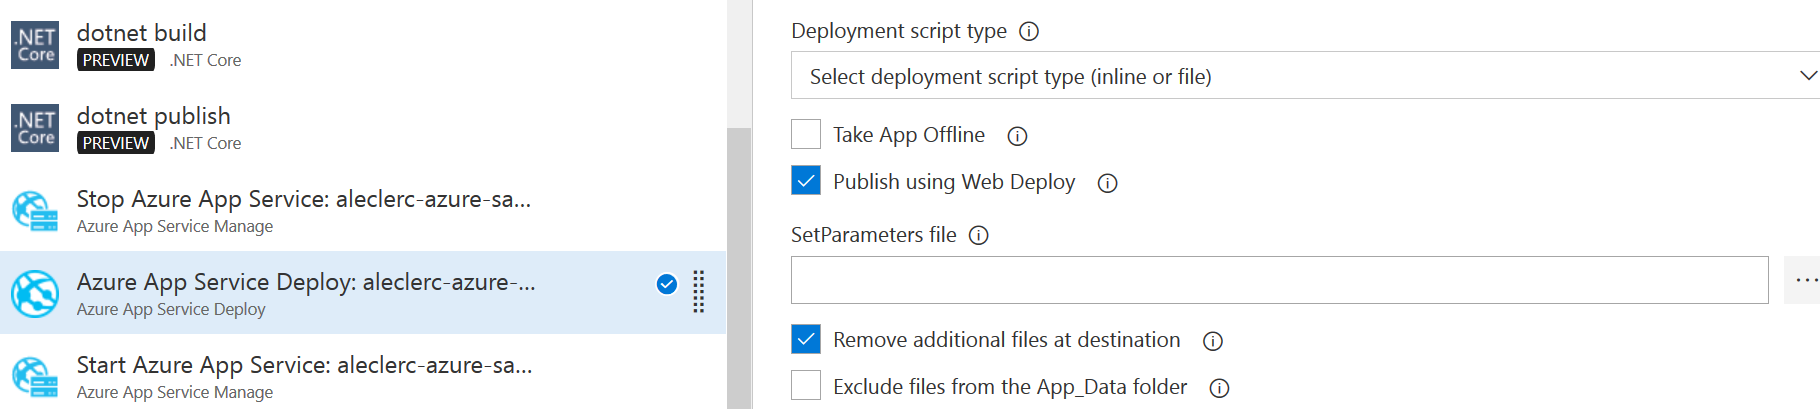
If you prefer to use WebDeploy to deploy your WebApp, please verify that the App_Data folder is not excluded, otherwise the WebJobs won’t be delivered with our application.
Once the deployment is done, we now see that the WebApp has been deployed, as well as the two WebJobs.
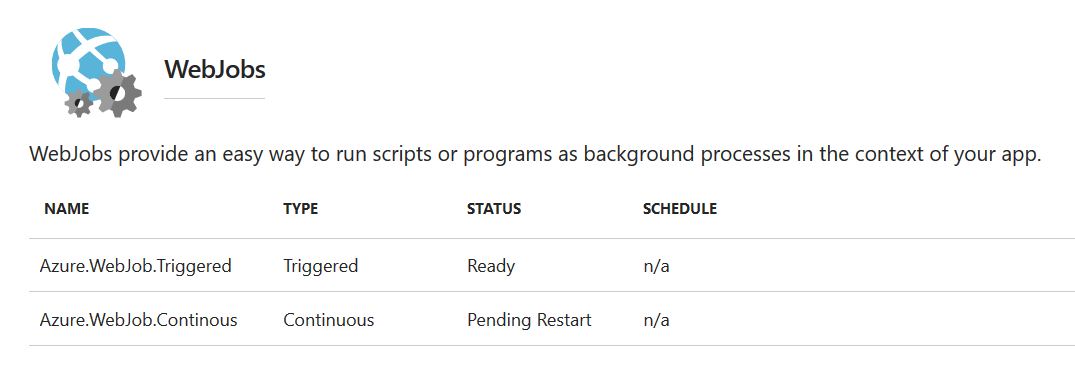
Et voilà! The continuous delivery of your .NET Core WebJobs is now set up and ready to use!


Dein Kommentar
An Diskussion beteiligen?Hinterlasse uns Deinen Kommentar!